{{ post.title }}
글 편집
글 편집 (이전 에디터)
{{ post.author.name }}
Posted on
| Version | {{ post.target_version }} | Product |
{{ product.name }}
|
|---|---|---|---|
| Tutorial/Manual | {{ post.manual_title }} | Attached File | {{ post.file.upload_filename }} |
Introduction
Example file download
Introduction
In the case of 'Sphere to Arc Revolution' contact entity, it had been developed for efficient contact calculating about the Ball bearing. In V8R5, for efficient calculating such as Ball Screw system, the 'Pitch Option' of Arc Revolution Surface has been added to the 'Sphere to Arc Revolution' primitive contact. Therefore, users can get (the) more accurate contact results for the Ball Screw contact problem.
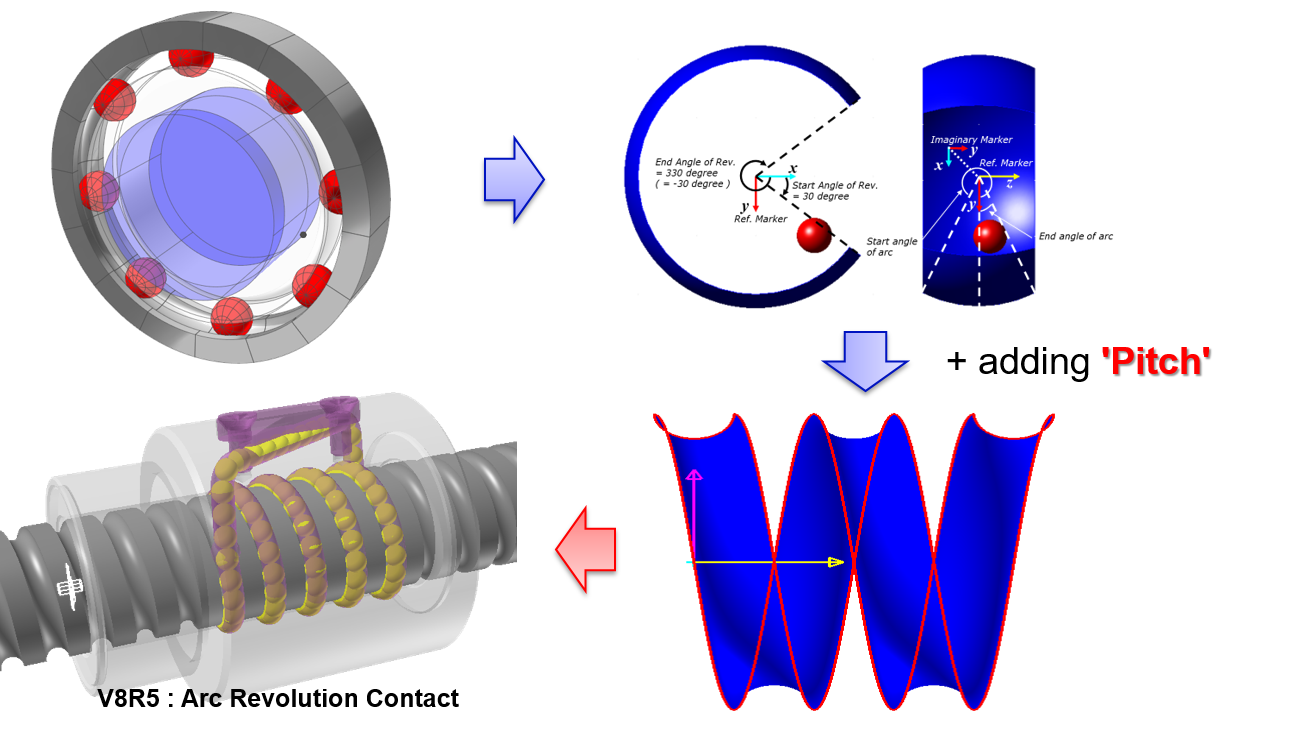
Contact Surface Representation
- The surface equation of sphere is defined with radius and center position of the sphere.
- (And,) the opposite surface equation is also defined with arc revolution with pitch geometry information.

Creation Option 1 - 'Circle, Point, Direction, Angle'
[Steps]
- Enter the Body-Edit mode.
- Create the Arc geometry with Radius '1', Angle '180D'.
- Then, run the 'Arc Revolution' function with 'Circle, Point, Direction, Angle' creation option (This option is default).
- Select the Arc geometry that you created in step 2.
- Select the revolution center point(0,0,0) & Define the direction(0,1,0) to create Z-Axes for arc-revolution.
- Enter ‘360’ in the angle of revolution, then the Arc-Revolution geometry will be created as shown in the picture.
- Open the dialog of Arc-Revolution surface geometry.
- Check the 'Helix Curve' option, input '4' in the Pitch and '112' in the Total Length '112' in the dialog box.

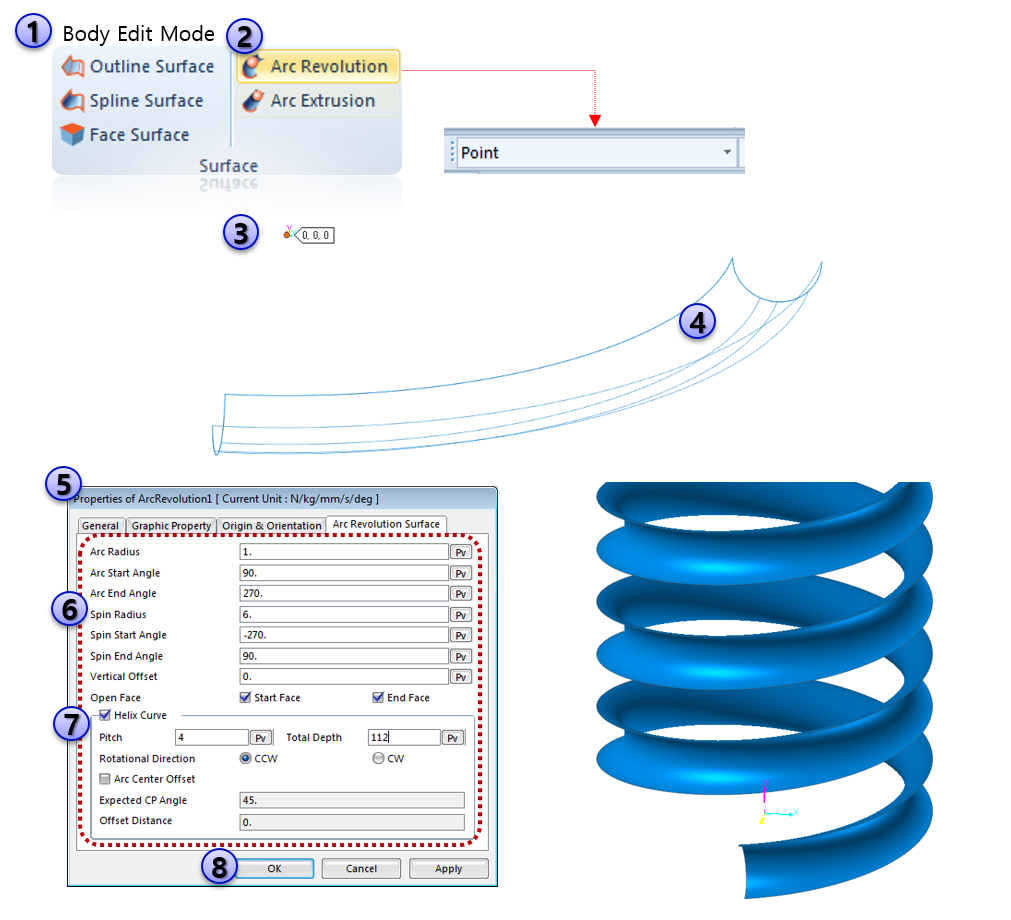
Creation Option 2 - 'Point'
[Steps]
- Enter the Body-Edit mode.
- Click the Arc Revolution icon, change the creation option to 'Point‘.
- Define the revolution center point as <0,0,0>.
- An arc-revolution surface with sample values will be created.
- Open the dialog of Arc-Revolution surface geometry.
- Modify all the data underneath the Arc Revolution Surface tab in this dialog box.
- Check the ‘Helix Curve’ option, enter ‘4’ in the Pitch and ‘112’ in the Total Length in the dialog box.
- Click the 'OK' button.
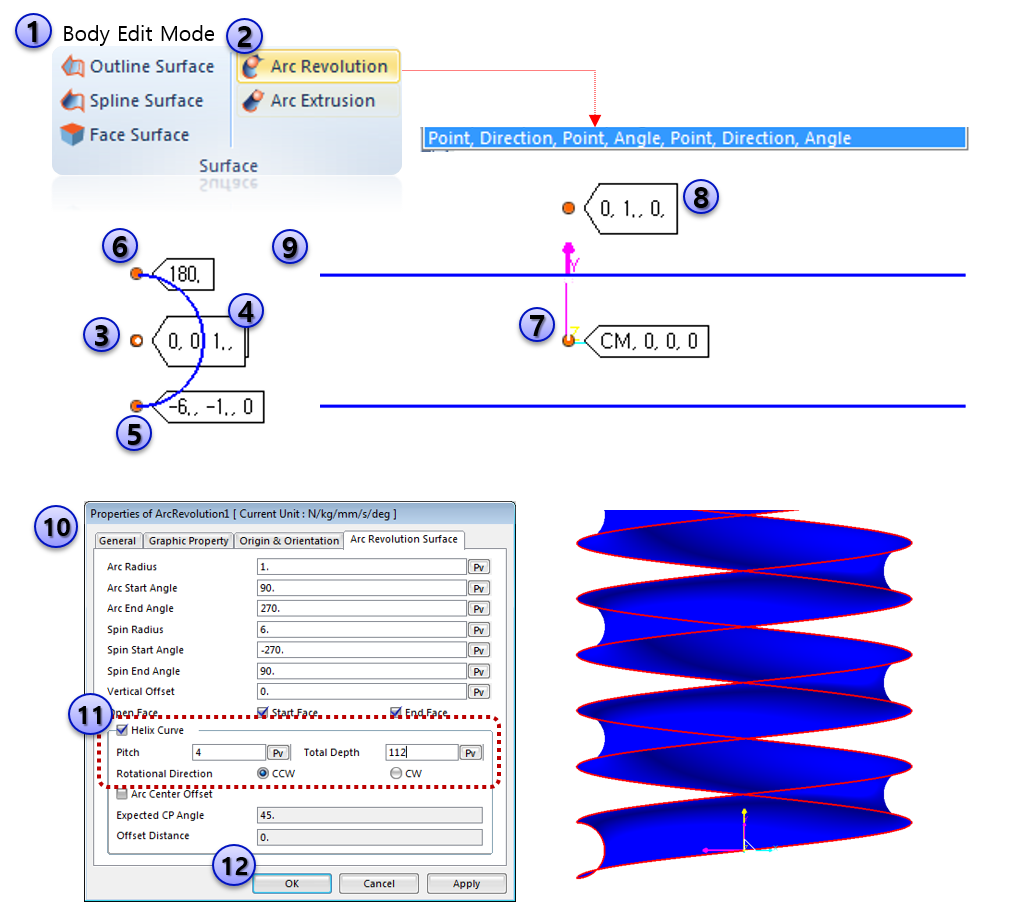
Creation Option 3 - 'Point, Direction, Point, Angle, Point, Direction, Angle'
[Steps]
-
- Enter the Body-Edit mode
- Click the Arc Revolution icon and change the creation option to 'Point,Direction,Point,Angle,Point,Direction,Angle‘.
- Define the revolution center point as <-6,,0,0>.
- Define the Normal Direction of Arc Created plane as <0,0,1>.
- Define the start point of Arc geometry as <-6,-1,0>.
- Define the Angle of Arc as 180.
- Select the center of Revolution.
- Define the Normal Direction of Revolution plane as <0,1,0>.
- Define the Angle of Revolution as 360.
- Open the dialog of Arc-Revolution surface geometry.
- Check the ‘Helix Curve’ option, enter ‘4’ in the Pitch and ‘112’ in the Total Length in the dialog box.