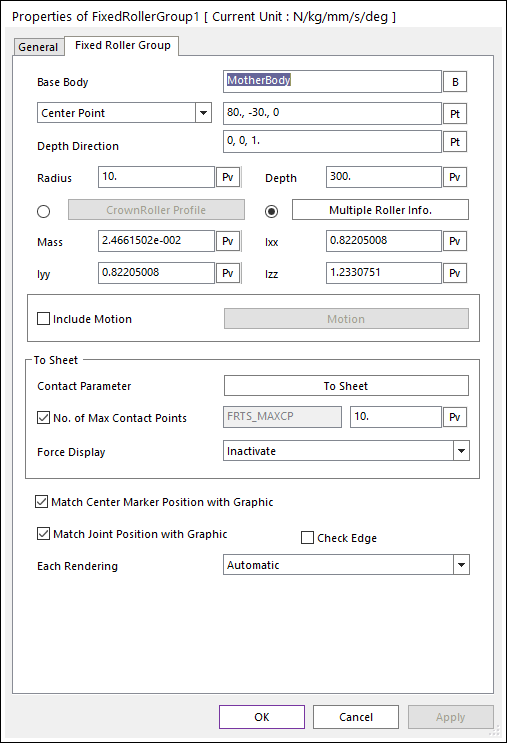
Figure 1 Fixed Roller Group property page [Fixed Roller Group]
The user can modify the properties of the Fixed Roller in this dialog box.
•Base Body: Defines the name of a carrier body that is connected to the Roller with a revolute joint.
•Center Point [Reference Point]: Defines the center point of the Fixed Roller body or reference point of a cylindrical geometry.
•Depth Direction [Direction Point]: Defines the axial direction or direction point of the cylinder.
•Radius: Defines the radius of the cylinder.
•CrownRoller Profile: When the roller shape is the crown roller type, this option is useful. The graphic and contact geometry of a roller is defined from Crown roller profile information.
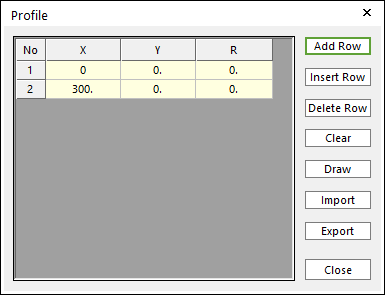
Figure 2 Profile dialog box of Crown roller
•X,Y,R: Defines Points and radius.
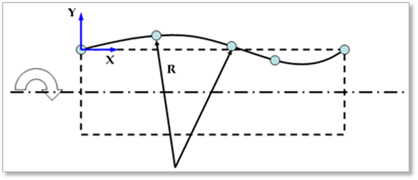
Figure 3 Definition of crown roller profile data
•Add Row: Adds a row to the end of the table.
•Insert Row: Inserts a row where the cursor is and move the current and later rows down.
•Delete Row: Deletes the row where the cursor is and move the later rows up.
•Clear: Deletes all rows in the table.
•Draw: All data must be defined with respect to the center marker. You can move points graphically by using the mouse directly.
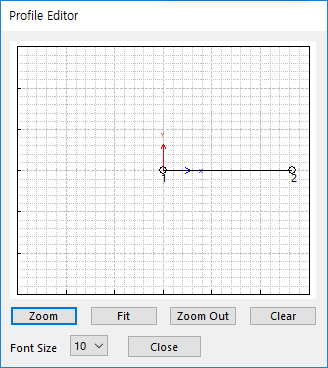
Figure 4 Profile Editor dialog box
•Import: Imports the X, Y, and R data pairs from a CSV file or a MAT file or a text file. In the case of the text file, the usage of the comma, the tab, and the space can be the delimiter between the three columns in the file. And when using the Excel file, the user can select the Tab-delimited text file output option or the CSV (Comma-Separated Values) file output option to save the Excel file which can be imported.
•Export: Exports the X, Y, and R data pairs to a CSV file or a MAT file or a text file.
•Multiple Roller Information: When one rotating shaft has multiple rollers, this option is useful. The graphic and contact geometry of a rotating shaft is defined from Radius, Depth and kinematical information as shown in Figure 5. And the graphic and contact geometry of sub rollers is defined in this dialog box.
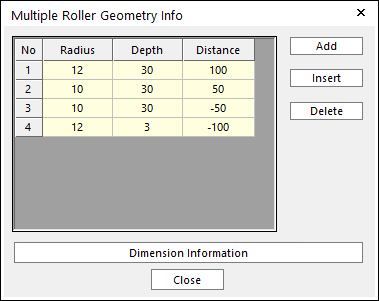
Figure 5 Multiple Roller Geometry Info dialog box
•Radius: Shows the radius of sub roller.
•Depth: Shows the length of sub roller.
•Distance: Shows the distance from the center of a rotating shaft to the center of a sub roller.
•Add: Adds a row to the end of the table.
•Insert: Inserts a row where the cursor is and move the current and later rows down.
•Delete: Deletes the row where the cursor is and move the later rows up.
•Dimension Information: Shows the dimension information for defining a multiple roller.
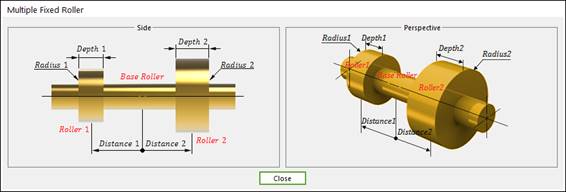
Figure 6 Multiple roller dimension information
•Depth: Defines the length of the cylinder.
•Mass: Defines the mass of the roller body.
•Ixx, Iyy, Izz: Defines the moments of Inertia of the roller body.
•Include Motion: Defines the angular motion of the Fixed Roller. You can define the roller displacement, velocity and acceleration by using a Function Expression. Refer to Motion.
•Contact Parameter: Allows the user to modify contact parameters by clicking To Sheet. In this dialog box, the user can modify the contact parameters of contact forces applied between the sheet and the fixed roller. Refer to the Contact Formulus for MTT3D.
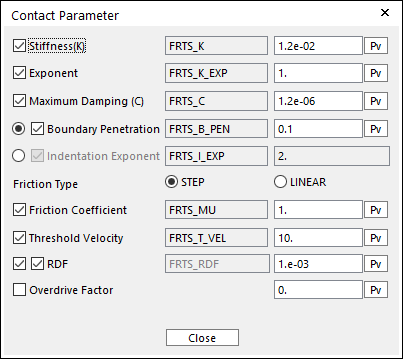
Figure 7 Contact Parameter dialog box
•No. of Max Contact Points: Defines the number of max contact point for output. User can define this value from 1 to 5000. This value only affects Force Display and RPLT data about the contact points. The default value is 10.
•Force Display: Graphically displays the all contact force vectors (the sum of the normal and tangential contact force) at each contact point up to the “No. of Max Contact Point”.
•Match Center Marker Position with Graphic: Match the position and orientation of the center marker of the roller body with the geometry reference frame.
•Match Joint Position with Graphic: Match the positions and orientations of the markers of the revolute joint with the geometry reference frame.
•Check Edge: When the roller radius is smaller than the lengths of a contacted shell element, the contact will not be worked. In this case, if this option is ON, the two end sides of the roller are checked in the sheet-to-roller contact. The contact geometry of the roller is represented as two spheres.
•Each Rendering: The selected mode can be displayed in Each Render mode. For more information, click here.