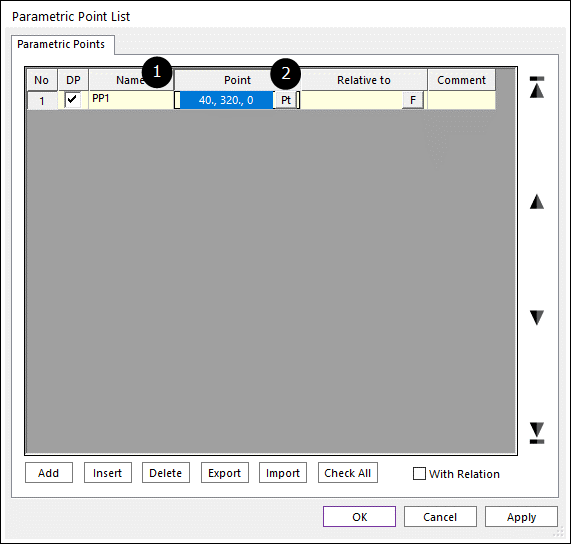
1. Click Parametric Point icon and then Parametric Point List dialog box appears as following figure.
Figure 1 Parametric Point List dialog box
•No: Shows the number of Parametric Point.
•DP: To export the *.rdp file, the user must check it.
•Name: Specifies the name of Parametric Point.
•Point: Specifies the point as desired.
•Relative to: Specifies the reference frame. The default is Inertia Reference Frame.
•Comment: Shows the comment of the Parametric Point.
•Add: Adds the row
•Insert: Inserts the row.
•Delete: Deletes the row.
•Export: Exports the Parametric Points list.
•Import: Imports the Parametric Points list.
•With relation: If this option is checked, the relation between Parametric Point and the point using Parametric Point keeps up when the Parametric Point file (*.rpp) is imported.
2. Click Add
3. Click  at the location as shown in the Figure
1 and type in the marker name in the edit box.
at the location as shown in the Figure
1 and type in the marker name in the edit box.
4. Click  at the location as shown in the Figure
1 and type in the X, Y, and Z values of the input position. The user can define
the marker position by clicking the left mouse button on the screen at the
desired position, and then pasting it into the dialog box of input field.
at the location as shown in the Figure
1 and type in the X, Y, and Z values of the input position. The user can define
the marker position by clicking the left mouse button on the screen at the
desired position, and then pasting it into the dialog box of input field.
5. Click OK and the user will see the Parametric Point icon on the screen.
Note
The Parametric Value is available in point.
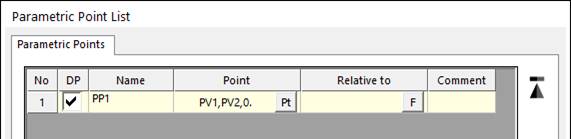
Figure 2 Using Parametric Value to register Parametric Point