The user can see the animation from the view of the selected marker and keep the viewing direction.
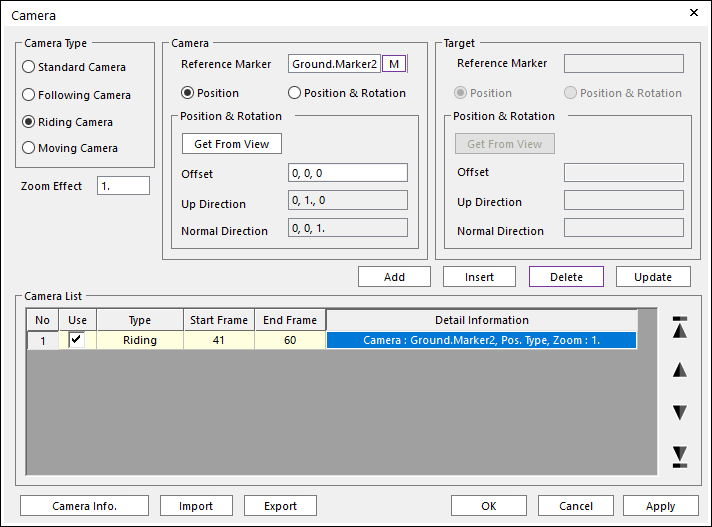
Figure 1 Camera dialog box [Riding Camera]
•Camera: This is regarding to camera viewpoint for Riding Camera.
•Reference Marker: Specifies the reference marker of camera viewpoint.
•Position: If this type is selected, the camera rides only on the position of the camera reference marker.
•Position & Rotation: If this type is selected, the camera rides on the position of the camera reference marker and if the marker rotates, the camera also rotate to the same direction.
•Position & Rotation Info.
o Get From View: The user can get information for current center viewpoint values with respect to the camera reference marker. The gotten values are set on Offset, Up Direction, and Normal Direction and could be modified. But, it is a little difficult to control them by yourselves.
o Offset: Defines the offset value from the camera reference marker.
o Up Direction: Defines the Y direction offset value from the camera reference marker.
o Normal Direction: Defines the Z direction offset value from the camera reference marker.
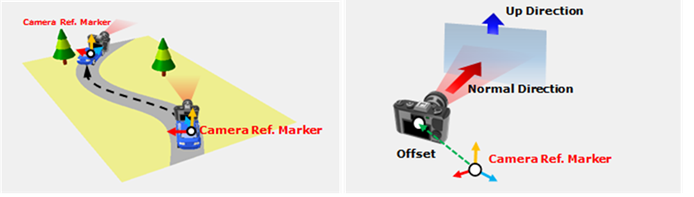
Figure 2 Riding Camera information
Step to use Riding Camera
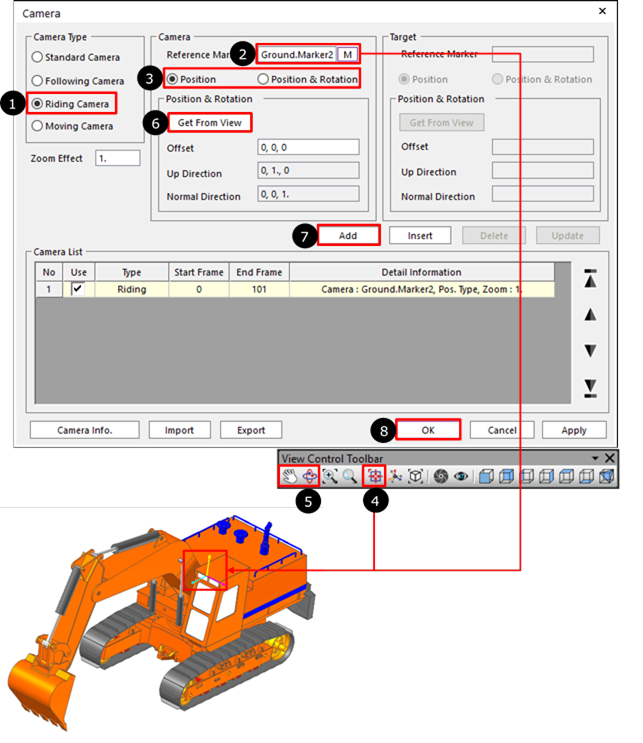
Figure 3 Step to use Riding Camera
1. Select the Riding Camera in Camera Type.
2. Specify the Reference Marker of the camera.
3. Select a type between Position and Position & Rotation.
4. Using “View Center” function in View Control Toolbar, Set the center position when playing the animation.
5. Using “Translate” and “Rotate” function in View Control Toolbar, Set the view state the user wants.
6. Click Get From View. Then Offset, Up Direction and Normal Direction are automatically set using view information.
•The user can specify the Offset, Up Direction and Normal Direction directly instead of step4-6. (It’s from Reference Marker.)
7. Click Add, then it’s added to Camera List. And play the animation.
8. Click OK, and then play the animation.