This function makes the user checks the relation between the selected entity and other entities such as Body, Joint, Force, Contact, PP, and PV as one-depth.
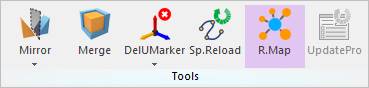
Figure 1 Relation Map icon in the Tools group of the Home tab
The entities are shown their icons like Database Window.
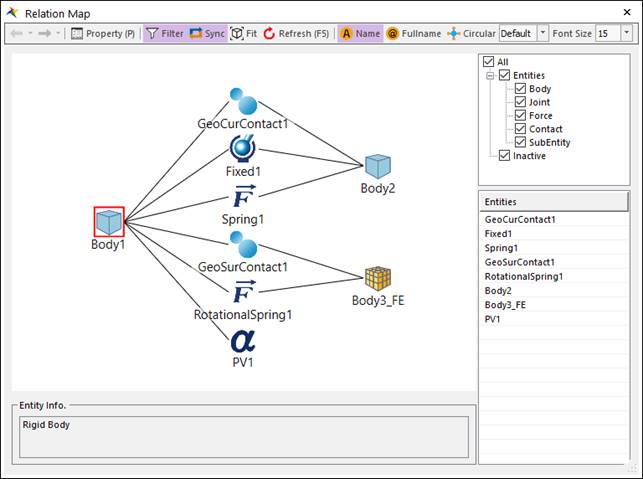
Figure 2 Relation Map dialog box
•← (Go Back): Navigates previous selected entities. (Shortcut: Ctrl + ←)
•→ (Go Forward): Navigates next selected entities. (Shortcut: Ctrl + →)
•Property: Show the selected entity’s property page. (Shortcut: P). And this Property menu can be showed up when you Right-click an entity on the Relation Map.
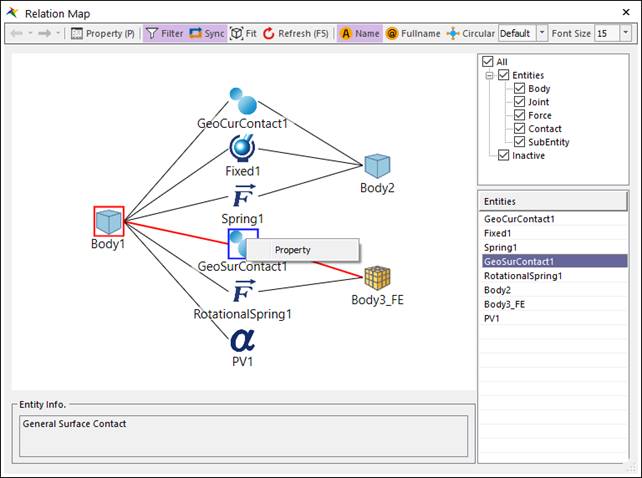
Figure 2b Right-click an entity on Relation Map
•Filter: Shows or hides related entities according to the checked category in the right tree (Body/Joint/Force/Contact/SubEntity/Inactive). This tree appears when the Filter is on. (Refer Figure 3a, 3b)
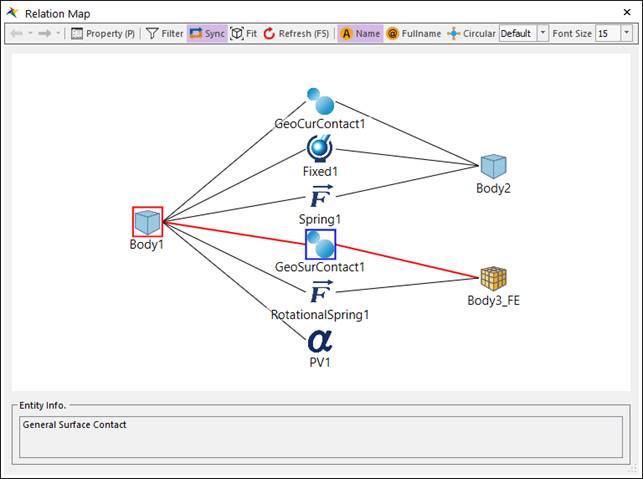
Figure 3a Filter Off status
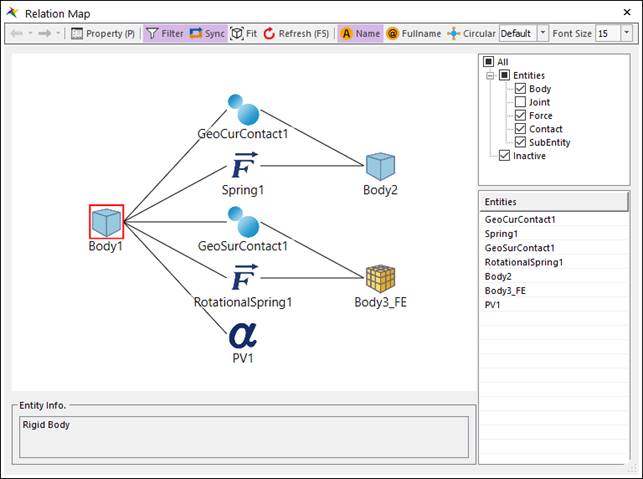
Figure 3b Filter On status with Joint filter
•Sync: Synchronizes the selected entity with Working Window or Database Window in order to show its type or name the Relation Map dialog box.
•Fit: Fits the selected entity on Working Window. This function supports only when the Sync function is on.
•Refresh: Updates diagrams in Relation Map. This feature is useful when the entity’s relation is updated outside of Relation Map. (Shortcut: F5)
•Name: Shows the name of the selected entity under its circle.
•Fullname: Shows the name of the entity with its subsystem. If an entity is related to another subsystem, the name will be shown with the information of its subsystem, e.g. Body1@Subsystem1.
•Circular: Shows entities in a circular arrangement.
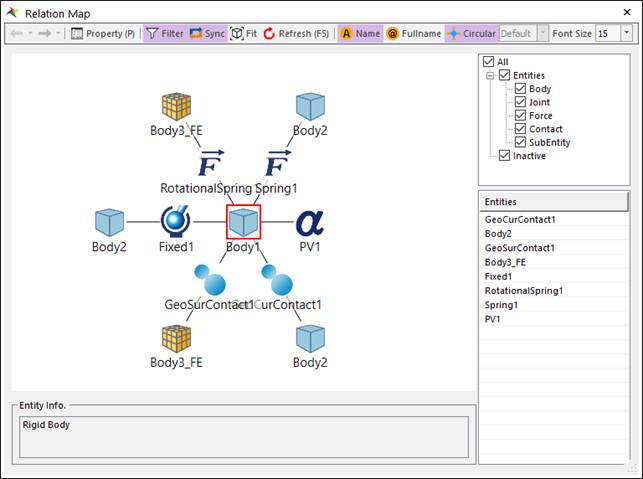
Figure 4 Circular On status
•Sort: Sorts and shows entities. This function does not support in the circular arrangement.
•Default: Default sorted status. Different from V9R3, 2-depth entities’ lines are not crossed.
•Name: Sorts entities into alphabetical order.
•Type: Sorts entities into entities’ type order. Generally, this follows Database Window’s order. (Groups – Bodies – Joints – Forces – Couplers – Contacts – PP – PV). In detail, Joints, Forces, Couplers and Contacts will follow Ribbon’s professional buttons’ order. For example, if there are some joints in Relation Map, Joints will be sorted into this order (Fixed – Translate – Cylindrical – Screw – Planar - …).
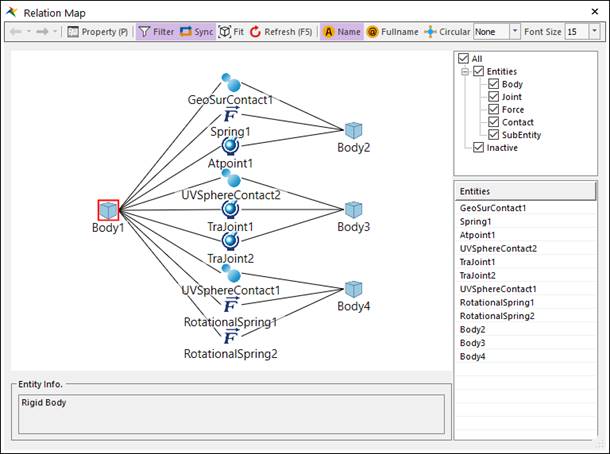
Figure 5b Sort – Default status
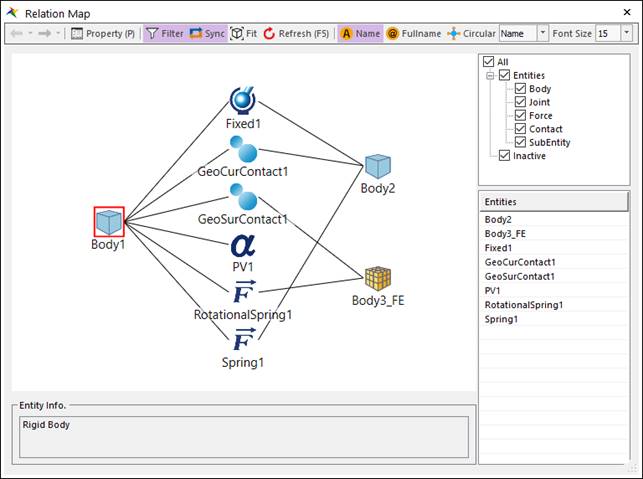
Figure 5b Sort - Name status
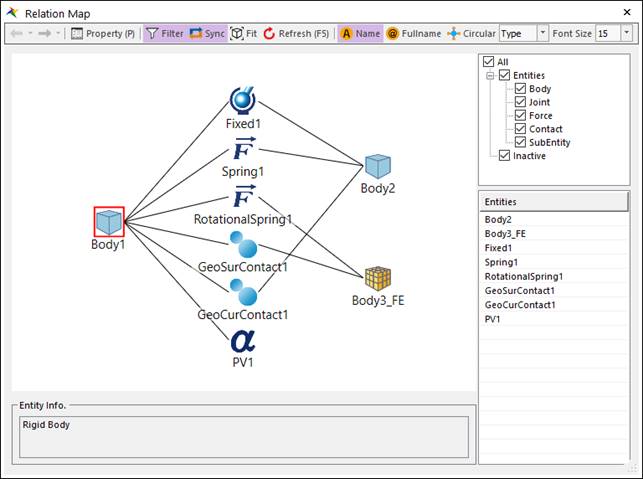
Figure 5c Sort - Type status
•Font Size: Changes the entities’ name size. Font size can be input an integer number between 10 and 20. Default font size is 15.
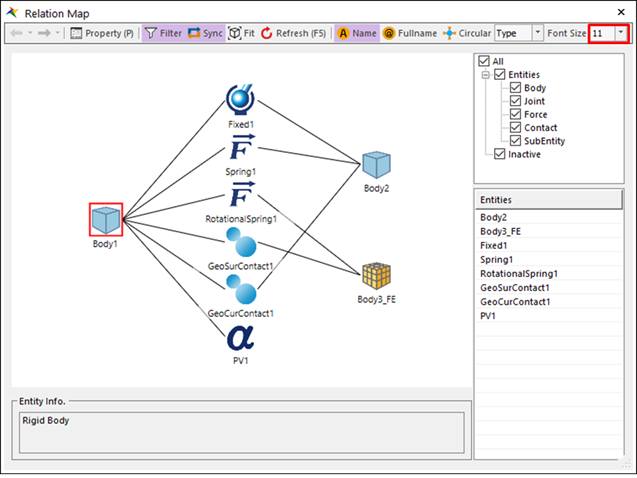
Figure 6 Font Size - 11 status
•Entity Info: Shows the brief information about the selected entity.
•All Entities: Shows the related entities according to the checked category in the right tree. If you select an entity in All Entities, it is selected on Relation Map automatically.
•2-Depth Relation: Usually Relation Map shows relation entities that are connected directly (1-Depth). But in case the related entities are contact(s), force(s), and Joint(s), Relation Map Shows all base and action entities (2-Depth).
Figure 7a 1-Depth Relation
Figure 7b 2-Depth Relation
•Inactive Entity: Entities that are set to Inactive are shown in gray icons.

Figure 8a Inactive Entities status

Figure 8b Inactive Entities Filtered status
Step to Use Relation Map
1. Select a desired entity to see relation.
2. Click Relation Map.
3. Select an entity in Database Window or Working Window, and then the selected entity is displayed in the center of the dialog box like Body1 in Figure 2. And related entities are shown up around the selected entity.
4. Click an entity on Relation Map, the selected one will be highlighted in a blue box. And related entities are linked in red lines.
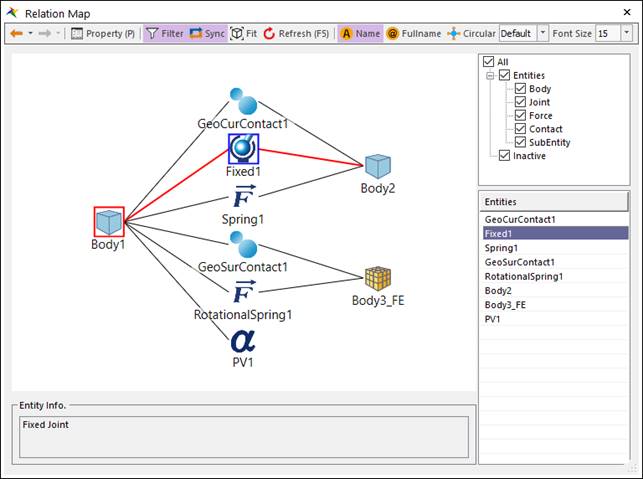
Figure 9 Selected status