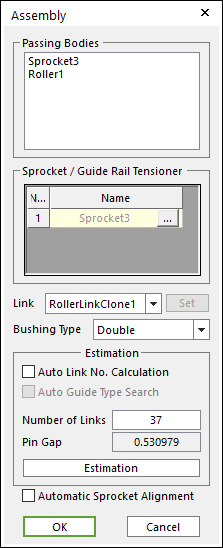
During assembly, a below dialog box is shown.

Figure 1 Assembly dialog box
•Passing Bodies: Shows the list of assembled bodies.
•Sprocket/Guide Rail Tensioner: Modifies the assembly information about Sprocket or Guide Rail Tensioner.
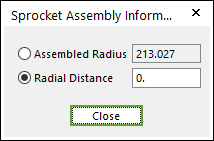
Figure 2 Sprocket Assembly Information dialog box
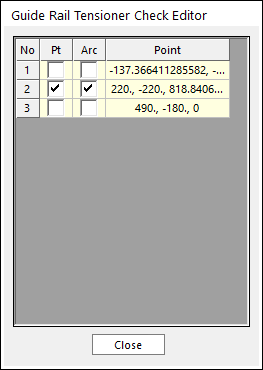
Figure 3 Guide Rail Tensioner Check Editor dialog box
•Link: Selects a clone link. If the user clicks Set, the user can customize the generated link set.
•Set: The user can use link sets wanted among the defined link sets. To use this function, the user must define link sets when creating clone of a link. For more information, click here.
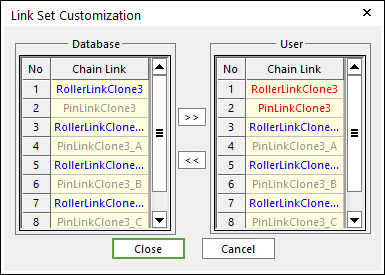
Figure 4 Link Set Customization dialog box
•Link Set Customization
o The user cannot move the first link and can compose user’s link by the database’s link.
o The composed link set is marked in the RMD file.
•Bushing Type: Selects a busing type. For more information, click here.
•Estimation: The user can estimate the assembled links.
•Auto Link No. Calculation: If the user clicks Estimation with the checked this option, the number of links is set automatically.
•Auto Guide Types Search: If the user wants to maintain the
Assembly Point of the Guide defined in Guide Rail
Tensioner Check Editor dialog box of Sprocket/Guide Rail
Tensioner function of the Assembly dialog box, this function can be
used. If this function is on, always make an assembly with the initial assembly
point automatically. 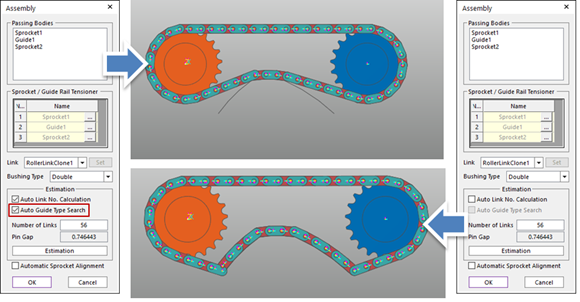
•Number of Links: Modifies the number of links.
•Pin Gap: Shows a value of pin gap.
•Automatic Sprocket Alignment: If this option is checked, the sprockets are rotated to match the position of the links.
•Note: If there are interference between a sprocket and a link after finishing assembly with this option, the alignment is failed.

Figure 5 After using ‘Automatic Sprocket Alignment’ option